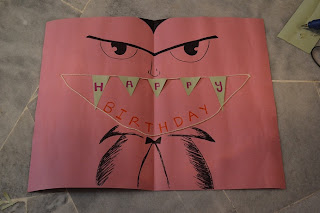
Hi everyone! I have a very simple tutorial for you today! It's the Vampire Themed Card!
What you will need :
1) Card base
2) Scissors
3) String
4) Hot glue gun / glue
5) Manilla Card
6) Pen
Step one : Fold your card base into half !
Step two : Cut two strings. One long enough for the top of the mouth length, and the other longer than the first to form a smile for the vampire.
Step three : Prepare your hot glue gun / glue.
Step four : Hold down the strings in place forming a smile and glue them down. Do so on both sides of the vampire smile.
You will end up with something like this. It doesn't look like a vampire's smile yet, but wait till you add the teeth!
Step five : Cut out some paper teeth (It can be coloured paper teeth too). Glue them to the string. I used hot glue gun as it's much easier, but you can use any glue available.
If it's for a birthday, you can do like what I've done here.
Step six : Draw out your vampire ! Do seek a computer (google)'s help if you are not sure how to draw a vampire.
Step seven : Make sure it works. Close the card and make sure the string doesn't go outside the card, and then open if to see the ginormous vampire smile with sharp teeth!
Step eight : If at step seven, the string of teeth comes out of the card, use your glue to glue the sides a little more inwards. That way, it will be steady like how you want it without cutting and re-adding the strings for the mouth.
That is all for this simple card! You can cut out black bats and frames of them to make the cover!


.JPG)


No comments:
Post a Comment