Hey everyone!
I haven't been posting for a couple of days as I was figuring how to expand my photo space. They didn't allow me to upload any more photos because I have reached my 1GB limit, and you have to start paying for more space. Luckily, a friend of mine who is a fashion blogger told me I could invite other authors to write. So, I invited BoxOfHobbies and am writing in a different account now in the same blog! Yipee!
I hear if you connect your blog to Google+, you get unlimited space though. I'll see if that works out soon. Well, here's a short simple tutorial for you!

What you need :
1) Tree Branches
2) Tape
3) Plastic cup with a lid
4) Any small decorative pieces
5) Blade
6) White paint / spray paint
Step One : Take the few branches and paint them white (Pick the branches with more splitting ends, those help to hold more accessories). Then, gather them by taping the ends together.

Step Two : Cut a small circle out of the plastic lid big enough for the end of the branches to go through.

Step Three : Hold the branches with one hand (Else it would fall) and start pouring in your small decorative pieces through the little hole where your branch pops out. You can also lift the lid a little to pour in, then finish up with the little hole on the lid.

Filling it up with some red seeds I collected long ago.
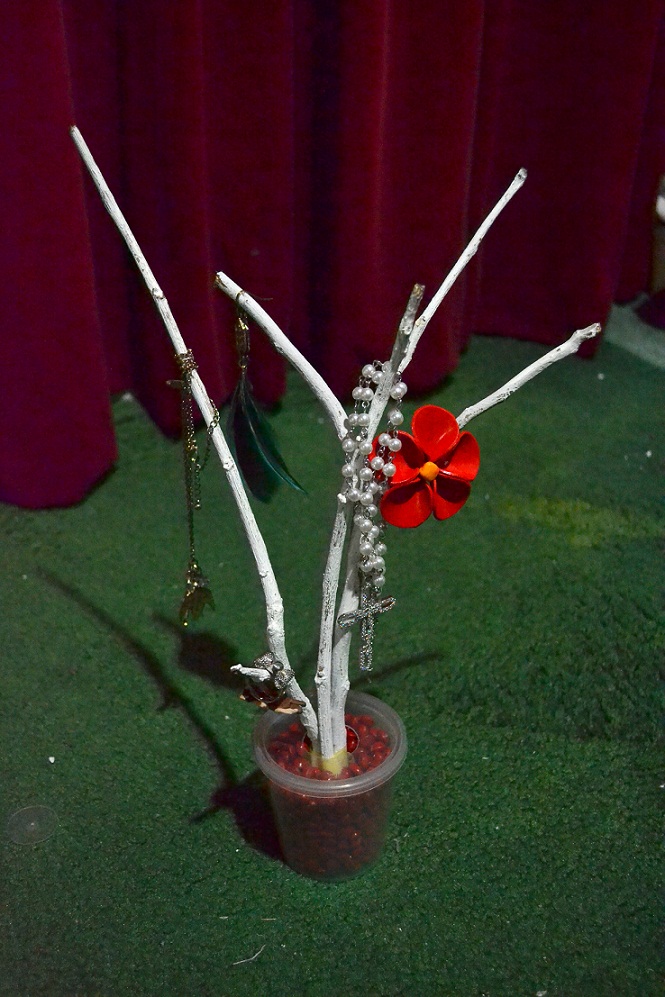
Step 4 : Make sure it is stable. If not, you can always add a stone at the bottom.
Step 5 : Dress the tree up in pretty accessories!

Tadaa! It is THAT simple! Best yet, the materials are easily available everywhere!
So, have fun and enjoy making your very own branch stand!
Bye!
No comments:
Post a Comment