Saturday, 28 December 2013

Children's Holiday Program 2013

Hello everyone! It's the children's holiday!
There was an event called 'Project Independence' by Sunnyside Daycare.
I was asked to help out for this event and I really enjoyed myself! I believe the kids really enjoyed themselves too! They got to play & learn so much!

One of our game session :


We learned to make simple food art with a sea themed!
The children loved it! They were so proud of their artwork.

 Focusing on where to put his fish.

Their hard work :
 This photo's upside down. Couldn't get it to rotate.


Other than the food art, I got to teach them to sew as well!
Surprisingly, the boys loved it so much! Now who says boys can't sew?
Check out Wesley with his handmade pencil case (unfinished) and Chen Han in the making of his!


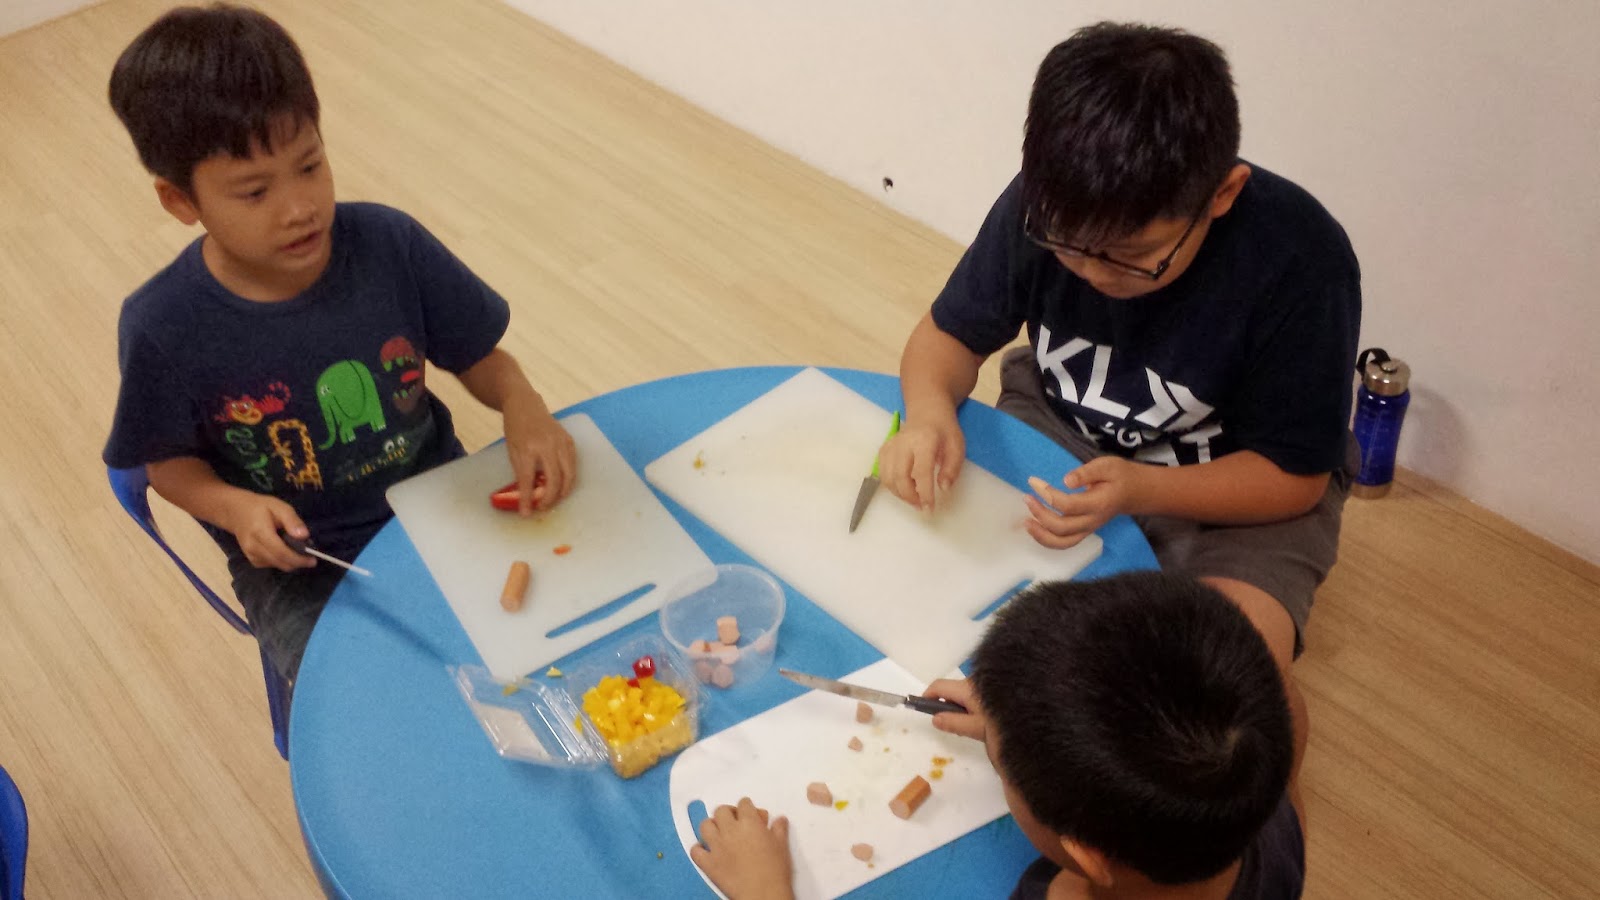
 We also had a pizza making session! The children got to cut their own ingredients (with supervision) and design their own pizza!
We gave them all a t-shirt with some templates and they got to design it themselves. They were also allowed do it without a template if they want.


 Wearing their awesomely decorated shirt with their handmade pencil cases!

 They are all really creative. Give them a box of hama beads and they'll be making all sorts of stuff! Here are a few keychains in the making.
They really enjoyed themselves and it's great to see how they love what they have learn. They also took the initiative to ask when they are unsure. Proud of them!

Well, that's all for this post.
Thanks for dropping by

Face/Body Painting

Hello! I recently participated in an event doing face/body painting..
so just thought of sharing a few things I've painted then..

 Cow

 Panda

and my favourite of the day :
 I drew the outline of the bird, coloured it in, then added the fluffy blue green colour on the outside as the sky.

 Clouds were added too! Happy little boy.
 
Batman

I also did a few Spiderman face paint, MU devil and Liverpool logo.
Unfortunately, I didn't have time to take a photo of them. Oh well. Shall do those again in the near future.

That's all for this post!
Tata!

Tuesday, 24 December 2013

Tutorial : Fixing Your Dead Tool's Plug


Oh, you know.. just an average day showing off my wings.

Anyways, HELLO!
Being a crafter, we got to face the facts that some things just don't go our way. The other day, I was fixing this huge project when... my oh-so-dear hot glue gun, decided it should lose a leg.

As you can see below, the 2 pin plug has a missing leg.
Since we're crafters, we might as well be 'doctors' too! I think it's really important for us to know how to fix certain things (the more the better!)
 So here's a tinsy winsy tip on changing your plug heads.

What you will need :
1) Extra plug head
2) Screwdriver
3) Wire stripper
4) Newspaper

First thing you got to do is to remove the original head. Then, open up your extra plug head with your screwdriver. It's fairly simple. Unscrew those bolts (golden in mine above) where they're holding down 3 different wires and take those wires out.
Next, you'll want to take the wire that is connected to your tool (my hot glue gun in this case) and use a wire stripper to remove the outer rubber coat. When that is done, it should look like something in the picture above where your mini wire strips are revealed. It may be two or three wires. Just let it be. Twist the ends of it if it's really messy. Don't worry, you won't be zapped.
 Then you'll have to connect it properly.

There's 3 wires to take note of :
1) Earth wire (Green/Yellow)
2) Live wire (Brown/Red)
3) Neutral (Blue)

The little white tube in the picture above is the fuse. The live wire goes to the knob right there. The neutral wire goes to the one at the bottom (reference : my photo above) and the last one which is the earth wire goes to the very top.

My tool only had 2 wires which is the Neutral wire and the Live wire.
Guess what?

That's basically it! You've just fixed it! All you need to do now is screw the cover back on, and try it out! It'll most probably be working as well as it used to!
 My new head has a huge hole as it was meant for bigger wires. So, I took some of my air dry clay and cover up the gap and hold my wire in place. It also looks pretty ugly with the hole there, so the clay makes it looks neater as well!

That's all!
Thanks for dropping by!


Sunday, 22 December 2013

Tutorial ( Food Art ) : Bunny At The Beach Breakfast!

Bunny At The Beach Bread Tutorial
Hi everyone! I've recently (well, not exactly very recent.. about a few months back), fell in love more and more with food art! I've actually been doing it since years back but they were all minor ones (smiley faces, bears, etc; just creating form what was already served). It was only recently that I decided to do more. Starting the food art from scratch! It's pretty fun.

Today we'll be making the Bunny At The Beach!


What is needed :
1) Plain bread
2) Two different coloured spread of your choice
3) Cheese
4) Hard boiled egg
 
 Place your plain bread on a tray or something to keep the table from being dirty.
 Cover it in your two different coloured spread like the above. I used milo powder (using kaya as glue) and peanut butter for this food art.
 Then, I cut out cheese to form the sun.
 Here's a bigger picture of the sun.
 Moving on,
Slice the hard boiled egg into half. Forming the body of the bunny. Then, cut 4 short strips and 2 long strips for the bunny's hands, legs, and ears! Place it on the bread like the above. Then, cut out a little sandcastle for your bunny food art with cheese!

You're pretty much done. Add in the eyes and the nose carefully.
Something feels pretty empty still.. so I added...
a shirt!

And tadaa! The bunny bread food art is done!
and the bunny shall be eaten. Opps!

Bye bunny!
Have fun with your food art!
Check out for more crafty followings at my instagram :
CraftySupermom
Find all artsy stuff with the hashtag #boxofhobbies

You can also check out my crafty facebook page : BoxOfHobbies

Friday, 20 December 2013

Clay Wedding Couple

This little project here is slightly rushed. A customer contacted me and asked if it could be done and collected in 2 days. So yeah. A slightly rushed work of a wedding couple.
I did the base and made the wedding dress in white.

Then added on the head and the arms. I did both the male and female's together so the arms are similar length. Then I created the body and attached them together.
Trying to see how it fits in the base.
Added on the hair and eyes. Left some space for extra details.
"CONGRATULATIONS"

That's all. Bye.

Monday, 16 December 2013

Transformation Tutorial : Earrings into Necklace

Hi everyone!
Here's a little something I did a couple of weeks back. I ordered some really pretty earrings for Walk In The Closet and a pair actually came broken. I have spare pearls at home, but they're not the same.. so, instead of fixing the earrings, I decided to turn the broken earring into a necklace!

What do you need?
1. Stud Earrings
2. Round Nose Pliers
3. Jumprings
4. Chains
 This is the back of the earring.
 I'm not sure if you can see it, but I've used the round nose plier to make a hoop from the earring's studs. When that is done, attach a similar coloured jump ring. In my case here, I used gold jump rings. 
 I had this extra thin silver chain lying around. I just thread the chain through the jump ring and Walah! It's a brand new necklace! It's THAT simple!
And this has became one of my favourite necklaces! I love how simple it is and it matches with about anything and everything in my wardrobe!

Well, that is all.
Thanks for dropping by!

Do check out my instagram (CraftySupermom) for more crafty followings!
Bye!

Saturday, 14 December 2013

Leopard Face Mask Tutorial

 Hi everyone! Today, I'll be showing you how to paint a leopard face mask. We used this one in a children's event - Emerge Junior 2013 held by CHCKL's Children's Church.

What you'll need :
1) Acrylic Paint
2) Plain Mask Base
(Canvas masks would be easier to paint, but one with a smooth surface is alright too)
3) Paint Brush


First of all, mix your paint.
Here we mixed two tones of orange. One slightly lighter with a 'gold' look.
 Acrylic works best without water. So if possible, do not mix any water unless it's really too thick and you are unable to paint evenly.

Start painting from the middle of the forehead outwards. Then followed by covering the eyes, nose and cheeks.. everything should start from the middle and dragged outwards. If you're using a smooth mask base, it might be a little trickier. Don't be too surprised when your paint brush actually takes away paint instead of putting on paint (It'll happen sometimes when you brush over existing paint trying to smooth the lines out).


 Take note of the forehead, eye corner, eye crease and cheeks. The lighter orange should be nicely blended in there as seen above. This is optional, and a little tricky as it may 'remove' instead of 'add' paint. Don't try to save every bit of paint, just paint the mask slightly thicker and wait for it to dry before adding the black rosettes. Acrylic paint dries pretty fast.
 Use the black paint to draw around the eyes like using an eyeliner. Then, paint a triangular shape around the nose and continue to add the thin slit of the mouth. Lastly, go crazy with the spots and rosettes. Do notice that the spots nearer to the middle of the face are usually just simple black dots while the ones on the sides are more of rosettes.

That is all!
Thanks for dropping by!
Do also visit my instagram : Craftysupermom