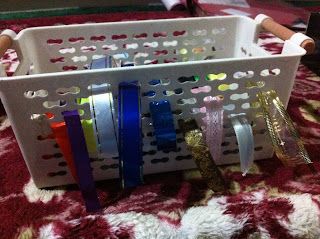
Ribbons, ribbons, ribbons!
I've been collecting a whole bunch of ribbons from everywhere. I didn't buy them (ya right...) but they seem to just grow out of nowhere!
Messy messy ribbons that would sprung out and dance into a pile of headache after.
And for that, I've decided to make myself a ribbon organizer!

What you will need :
1. A container/box like the above (or modify a shoebox to have several holes)
2. Strings
3. Cardboard
4. Scissors
5. Ribbons
6. Circle cutter (optional)
So, let's get started! The first thing you do, is to tie the string to one side of the container/box. This piece of string is to go through the loops of your ribbon and make sure they don't move too far.
Then, it's time to cut circles slightly bigger (This is very important. It has to be slightly bigger to hold your ribbon properly) than your ribbon's circumference. I used a circle cutter (you can buy them in your local book stores, else, hunt for Daiso). Poke a hole in the middle of the cardboard circles. I did that with a pencil and an eraser placed below where I want the hole to be. You can use anything soft to replace the eraser.
Put the ribbons and the cardboard circles in such an order :
Cardboard circle --> Ribbon --> Cardboard circle
Each time a ribbon is placed in, pull the ribbon out from the hole on the container or the shoe box.
Then repeat the order above.
It will look something like this.
The reason why you need the cardboard circle for the ribbon organizer, is so that the ribbons do not come off and it would be hard to pull the ribbon out from the front.
I used holes of different heights for different ribbons as some has a bigger circumference, and some has smaller ones. The DIY ribbon organizer is about done.
Here's the other side where the smaller ribbons are. I didn't have that many, and thus the ribbon organizer is only filled in half way.


Top view. My ribbons are placed randomly. It's alright to have it a little messy from the top view. You'll mostly be seeing the sides only. You can decorate a cover and place it on top to hide the ugliness too if you wish. And with that, the ribbon organizer is done!
I love my DIY ribbon organizer! It has served me well so far. No more messy ribbons!
End.


No comments:
Post a Comment