Hi everyone!! I've posted this completed photo of Sven from Frozen I made with clay on my
instagram some time back, but only had the chance to post its tutorial now. So here goes :
What you'll need :
1) Clay (Brown, White/Beige, Dark Brown, Black-optional)
2) Clay tools if available
3) Scissors (small ones if available)
4) Wires
5) Glue / Bake N Bond
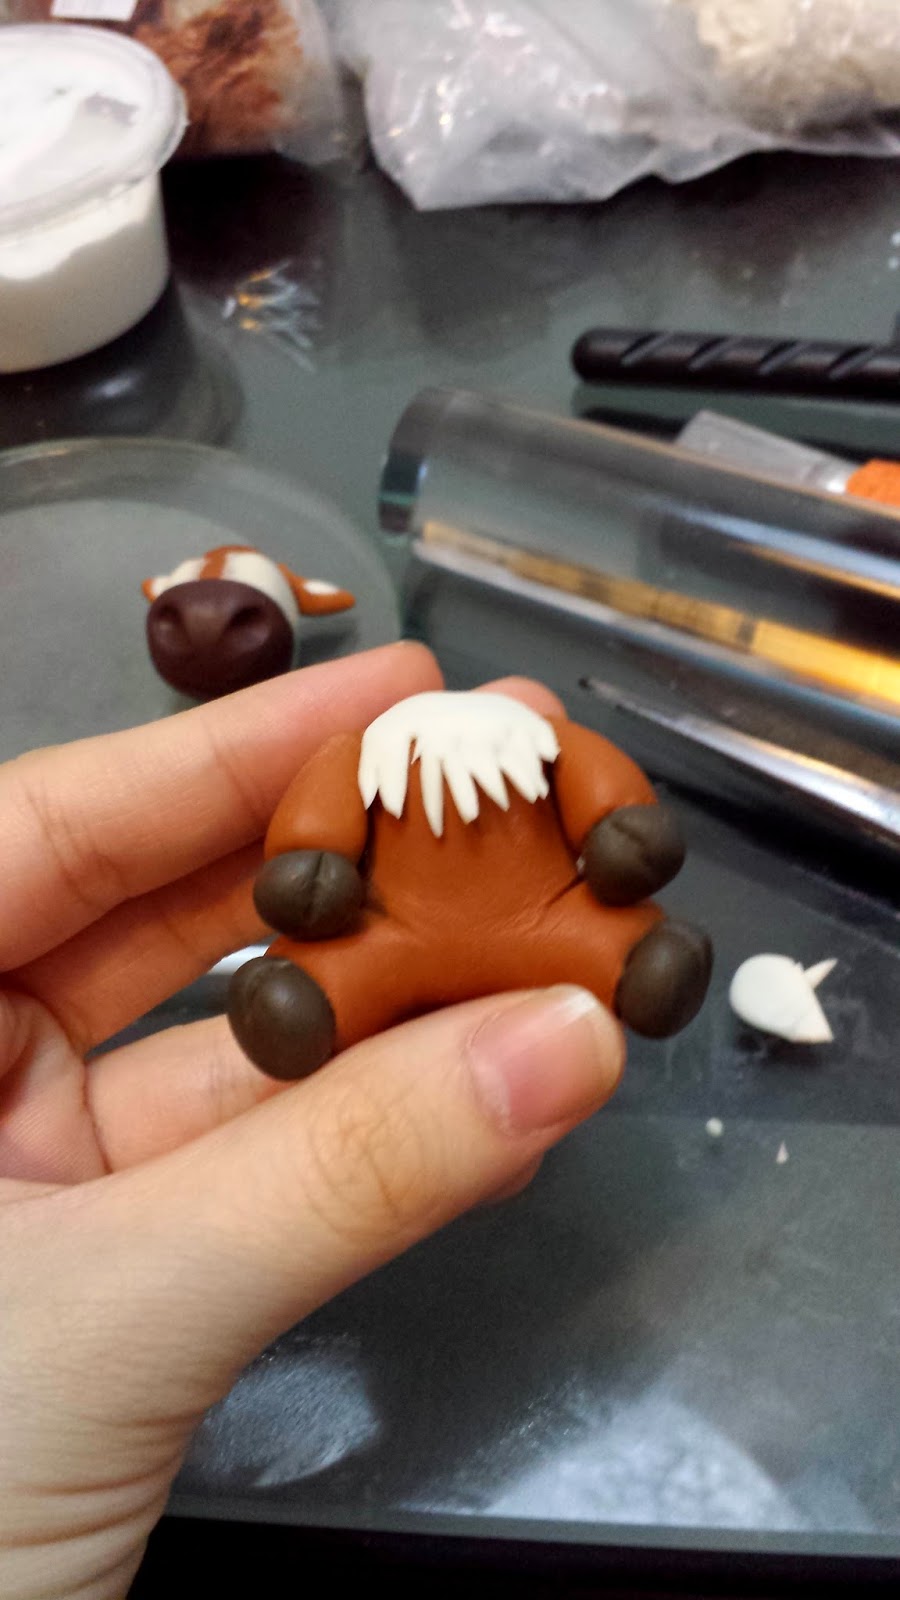
Using the brown clay, pinch out an appropriate amount of clay for Sven's head, body (with legs) and hands. To make the body, roll out a cylinder shape and cut the bottom into half. Then, gently use your fingers to smoothen it out to form rounder legs. Use a toothpick or your clay tools to draw a line at the top of the legs then push the cylinder body down on the table top and gently use your hands to help push the legs up as shown in the photo.
Make Sven's hands the same length as the feet or slightly longer. I also made them skinnier than Sven's feet.
Now, to make the head. Roll a ball shape and gently use your finger to roll one side till the whole piece has a teardrop shape. Then, Poke two holes on it's head for Sven's antlers later on (it will be attached with a wire so it doesn't fall out easily). I used a ball tip to poke the sides of Sven's head for it's ears. Leave it aside to dry (for air dry clay).
Next, we're making Sven's hands and feet hoofs. Make 2 larger balls of dark brown and 2 slightly smaller balls of dark brown for this.
Press them down gently on the table so its flat on both ends. Use your tool/toothpick to press down once side till it's slightly to the middle (as shown in the photo above). Use glue to stick Sven's hoof to his legs. Repeat the same thing for his hands.
Sven has some white/beige colour around his eyes. I made two flat pieces to stick it on and blended the sides out as much as I could.
Sven's muzzle is made with dark brown clay (it looks a little maroon-ish though) and a ball tip is used to make his nostril and a sharp clay tool is used to draw a line for his mouth.
Put them together and it should look like this.
For the ears, take a ball of brown clay shaped into a droplet shape, and a smaller ball of beige clay shaped into a droplet shape as well. Press them flat together and use a clay tool to press it from inner ear outwards. Meaning the rounded end to the sharp end.
Sven from Frozen has white 'chest hair'.
So, I rolled out a thin piece of clay about x2 size of it's neck. I shaped the back a little rounder for the 'fluff' effect? and used a scissors to cut up strips in front. I did a second layer the exact same method. I poked a hole with my wire for attaching the head later on.
I added 2 tiny brown clay for Sven's eyes then added the eye whites.
Let's give Sven a little tail. Again, you can use scissors or a needle to make the tail ends.
Make the antlers by rolling white/beige clay around a wire for the main piece, then add a small piece to the side blending it together. Leave a tinsy bit of wire at the ends and poke it down the head. Use glue to secure it better.
I then painted the white part black. You can use black clay for this as well. I initially did a small black dot where you can see the whites still, but Sven from Frozen looked a little scary with that. So I painted it full black in the end.
The End!
Hope you enjoyed my tutorial on making Baby Sven from Frozen with clay!
For more crafty journeys,
Instagram
@Craftysupermom


