Thursday, 18 October 2012

Dip Dye , Tie Dye Shirts

 It's a colourful day! When I got home yesterday, my sister and her friends ( G.I.Locket ) were dip-dying their clothes. And so, I decided to join in and went on a hunt for old or dye-able clothes. Here are a few photos.
 Everyone started soaking their clothes in different coloured solution.
 Purple seems to be a favourite.

 Pink is quite favourable too.
 I didn't want to flood the post with too many photos, but then I couldn't pick which to put up.
 The whole process was actually pretty simple. After following the instructions on the package to soak the clothes, you'll just need to bring the clothes to be soaked in cold water, warm water and then cold water again. This allows the colour to get 'locked' in the clothing. 

 Do take note that some of the colour would come off, and that is normal. Squeeze the shirt as it's being soaked into the cold and warm water. It's okay for the colours to come off a little. Leave them aside to dry after that. We let ours sit in the living room beneath the fan.
They turn out quite pretty don't they?
 I tried tie-dying too. I didn't know if it'll work at first.
But I'm glad it did! Check it out! Pretty cool eh? Maybe you could try them too!
That's all for this randomly colourful post. Bye!

Tuesday, 16 October 2012

Planking Awkward Rhino

 At the beach! This picture looks a little chubby, but I still kinda like it.
 Meet my Awkward Rhino ! It's planking on the bed frame! How adorable.
 Love Love Love Love my little planking rhino !
 Something came in the mail today!
And as always, I'm EXCITED ! I can't wait to start using them! I want to bling phone covers for BoxOfHobbies !

I never knew simple plain bead bracelets could look so awesome! Never knew till a customer specially orders some of them.
 One by itself may look a little too simple, but a few together sure makes a difference!
 Everything is handmade. Even the beads!
Mix and match any preferred colours!
Alright. That's all for today's post! Here's a picture of my awkward baby and I ! 
Do return a huge awkward smile. Hee! Tata people!

Saturday, 13 October 2012

Children's Event : Fun Factory !

Hey everyone! Are you dog friendly? Cause dear Roxy here wants to shake your hand!
 Ain't this 6yr old adorable?

In one of my previous post, I mentioned Fun Factory. Well, fun factory is basically a children's weekend in my church - City Harvest. So, on that weekend itself, we had children sharing their testimonies, giving offering challenge, doing dance, drama & a lot more! We even had some workshops after the service. Here are some photos of the kids and I.
 That's Maureen, Venessa and Rebecca.
 He actually came real close to the camera, but when I said "1,2,3", he leaned backwards. Cheeky little fella.
 This is Reuben. My junior class kid. A boy who loves his transformers, iron man and thomas & friends very much.
 The two main characters of the children drama. Snow White and her prince charming.
In the drama, prince charming ( Wesley ) went : "I am the prince, I mean.. I was the prince, now I'm your slave". The crowd's heart just melted right there. How adorable.
I don't have that many photos sadly. Didn't get to take pictures with all of them. Oh wells, now, it's time to update about BoxOfHobbies.

Remember how I talked about the earrings which comes from the back? 
 They are born! Thing is, the studs are not done yet because I don't have enough of those flatbase pearls. I'm buying some real soon so I can get these gorgeous earrings up. Other than that, Patchy Puzzles have been on the move too!
These came in the mail! I bought some items to check their actual products as well as the quality. Some were good and some weren't. The few good ones are now up in BoxOfHobbies!
Same concept as my button earrings, these lovelies which I call "3mini peek-a-boos" appears from behind the ears as well! I only bought 1 pink and 1 purple then. Will be buying more for myself as well as BoxOfHobbies. 2 person has already pre-ordered this. 
Rm8 Owl necklace.
Rm5 Little Ballet Slipper Earrings.
All these 3 items could be bought from BoxOfHobbies! If they're out, just contact them and they might help you pre-order the items.
That was all the updates about BoxOfHobbies. Here's Roxy to bid you goodbye. Toodles!

Sunday, 7 October 2012

Tutorial : A Sunny Felt Sunflower !

 What's yellow, bright & never fails to put a smile on everyone's face? Sunflowers! Okay, maybe not everyone, but I know quite a number of people who loves sunflowers! One of them is myself! The picture above shows two sunflower which I got during my birthday this year (2012). Aww. The sunflower on the right is from a hair clip.
 Blue helium balloons and bright yellow sunflowers! My friends know me well (':
Anyways, the reason why it's so sunny sunflowery, is because I just finished a sunflower project! And now, I'm going to show you how I made it! 
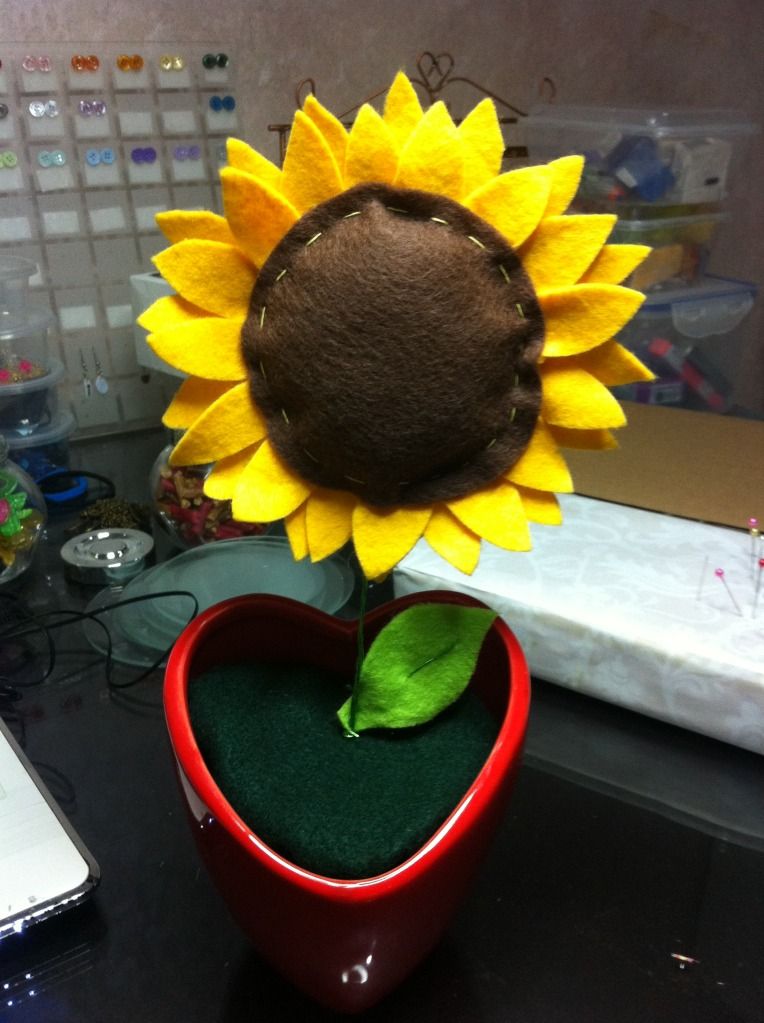
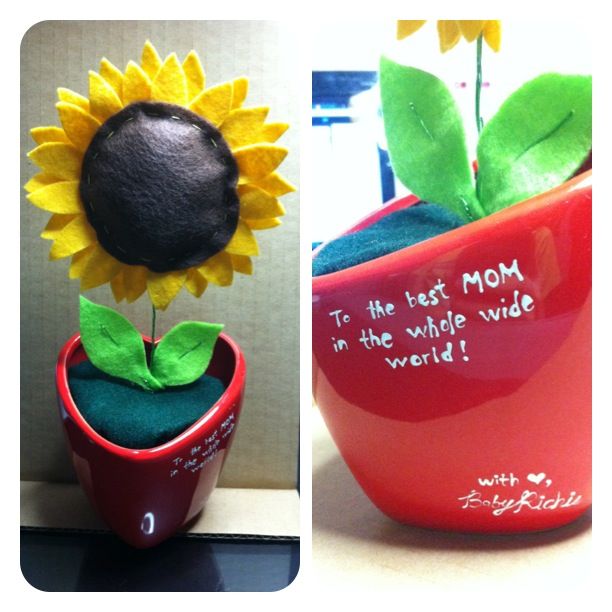
 This is how it looks like. I'm very happy with the result.

Materials needed : 
1. Scissors
2. Sewing thread
3. Sewing needle
4. Felt fabric
5. Wire
6. Styrofoam
7. Tiny pot

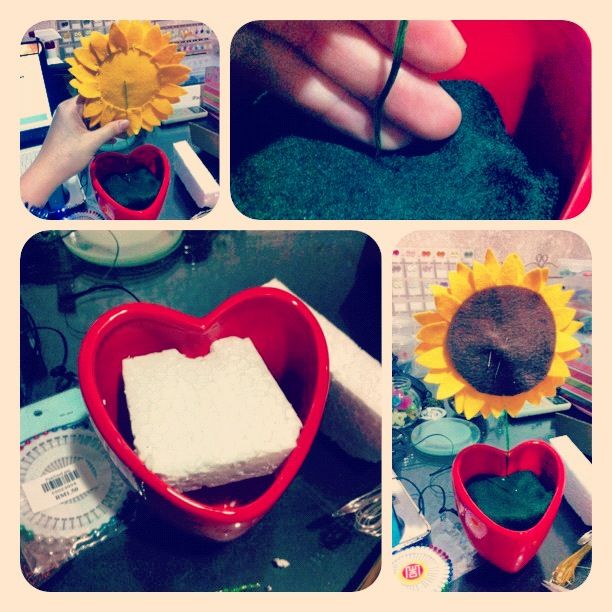
Here's how I started.
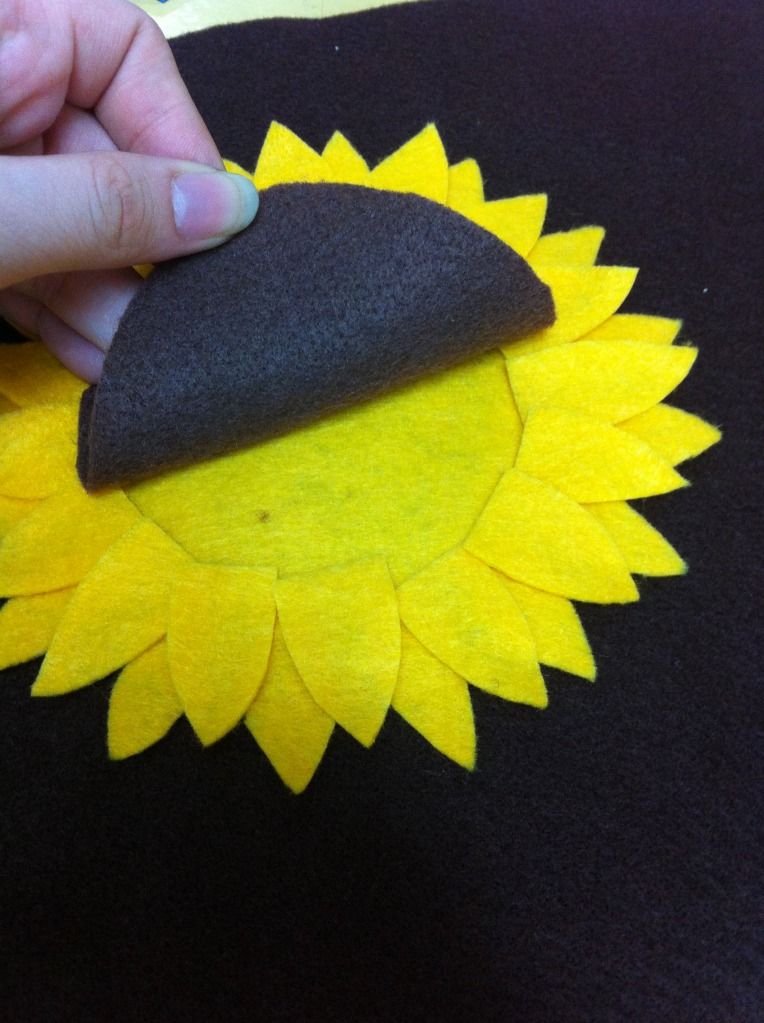
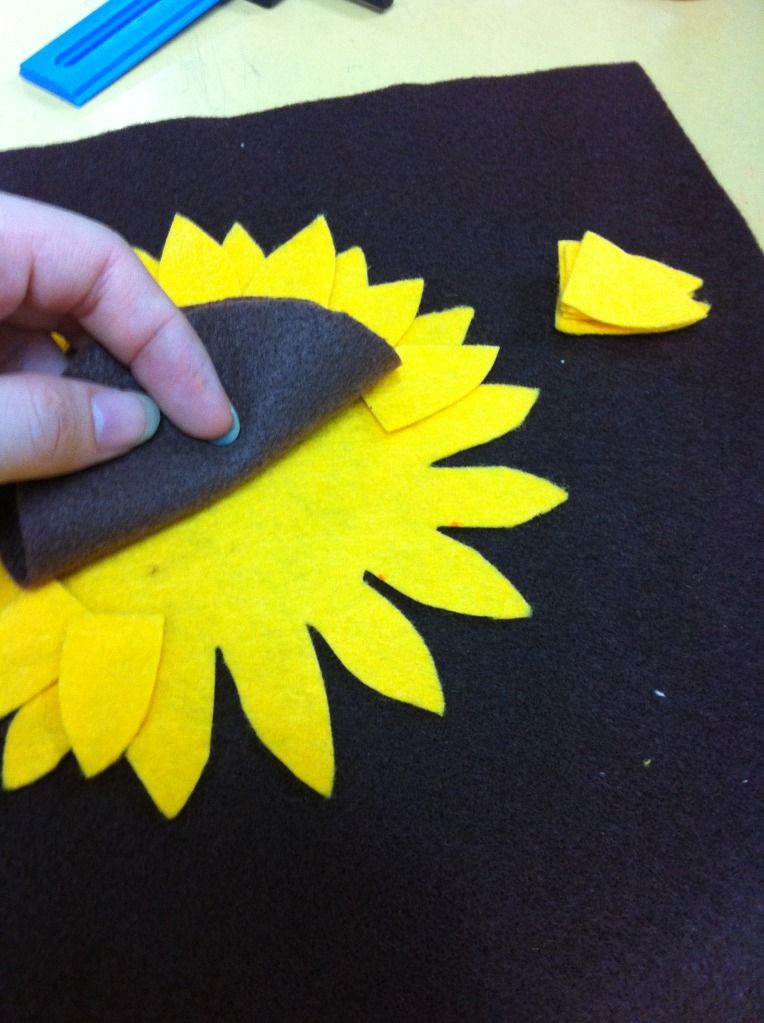
 I drew the base of the sunflower head on the felt. Then, I cut it out. The sunflower looks odd with only one layer. So I cut petal by petal to fill in the gaps in the base. When that is done, cut a brown felt circle and put everything in place to see if you're satisfied with how it looks.
 It should look something like this.
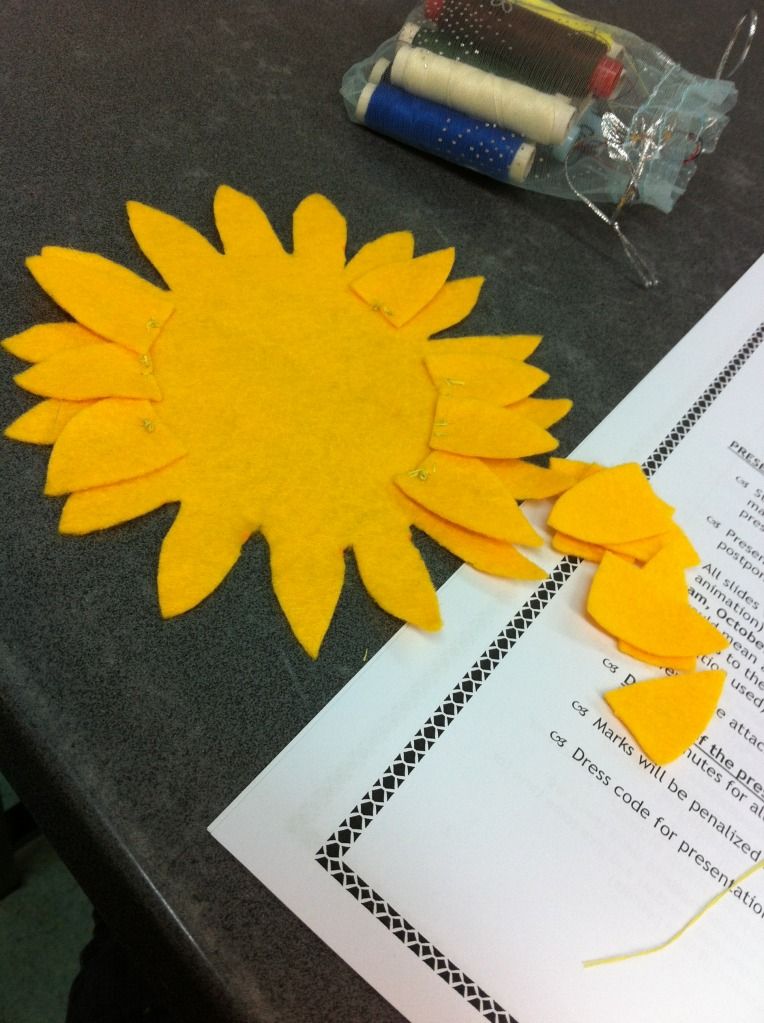
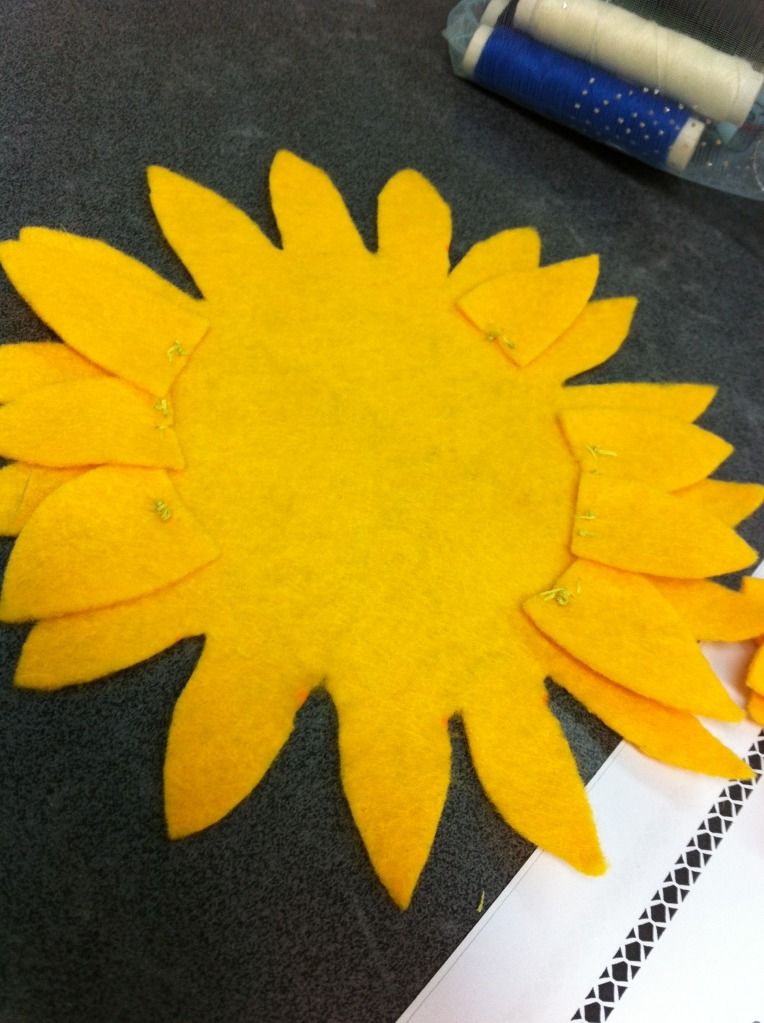
 Now, take them apart again and sew the one piece petals on the full base. I didn't sew it fully, but just the bottom middle of each petal.
 Could you see where the threads go? Bottom middle of each tiny petal. Sew all of them together with the base till you have full petals.

 I got the pot from Daiso in Sunway Pyramid, but you can get any small pot that suits. Try to make sure that the pot is heavy. Try stones if you're using the plastic pots. Then, cut a piece of styrofoam to fit the middle-ish area of the pot. This is to hold the flower.
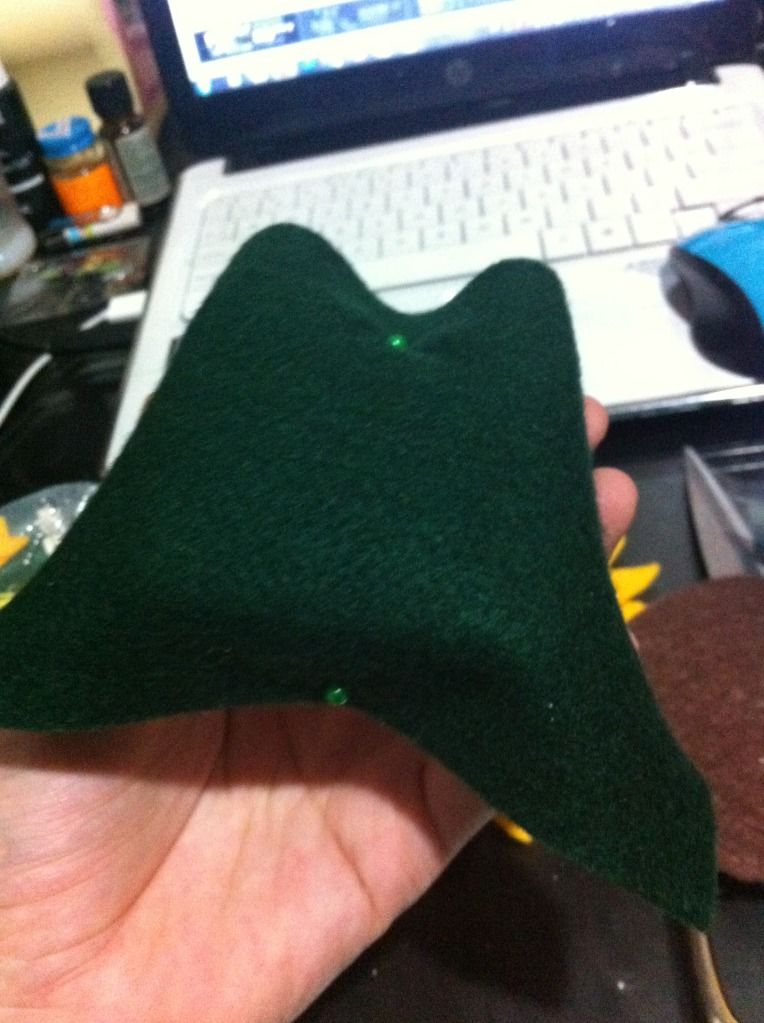
Wrap the styrofoam in a piece of green felt fabric. I pinned the top and bottom down. To reduce the wastage of the pins, I just held down the two sides while placing it in the pot.

How to attach the wire :
1. If the wire is thin, fold it a couple of times and twist them together to make it thicker and stronger (By folding, you automatically have a tiny loop at the top which you can sew securely later on). Then, sew the wire to the felt. Make sure to only go through half the felt so you can't see threads behind the sunflower.
2. If the wire is thick and strong enough, just fold the very top end a little and twist to secure a loop. Then, start to sew all around it and secure it there. ake sure to only go through half the felt so you can't see threads behind the sunflower.

Use a needle to make a hold in the base felt (green felt on the styrofoam piece) and pierce the wire stem in.
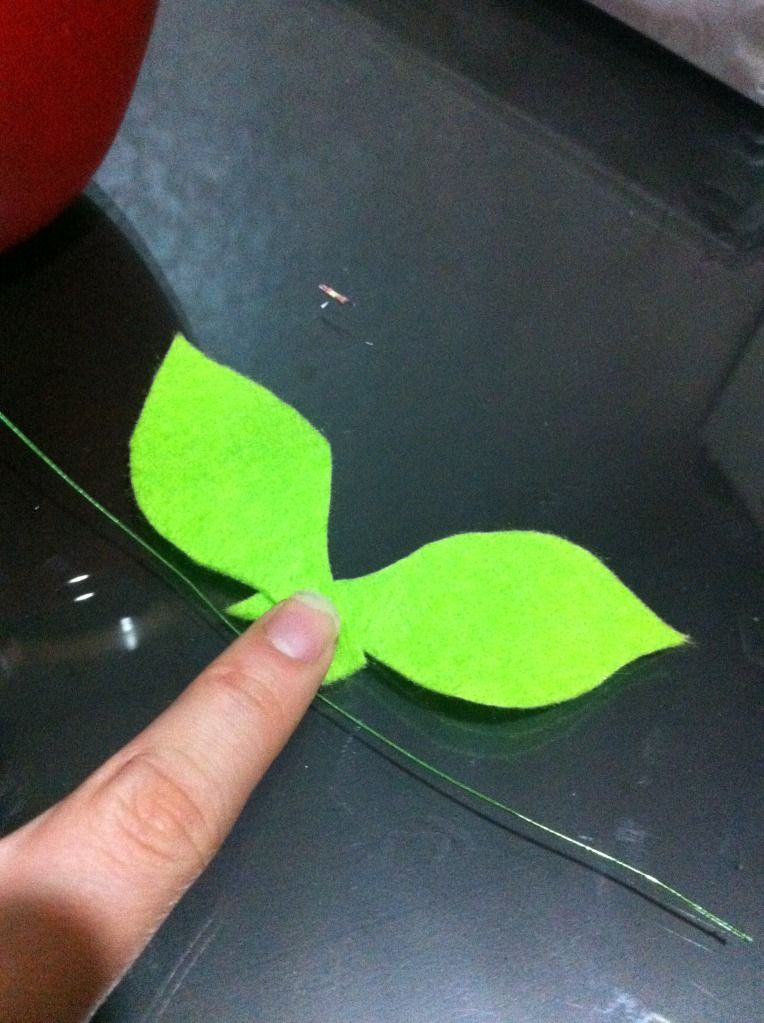
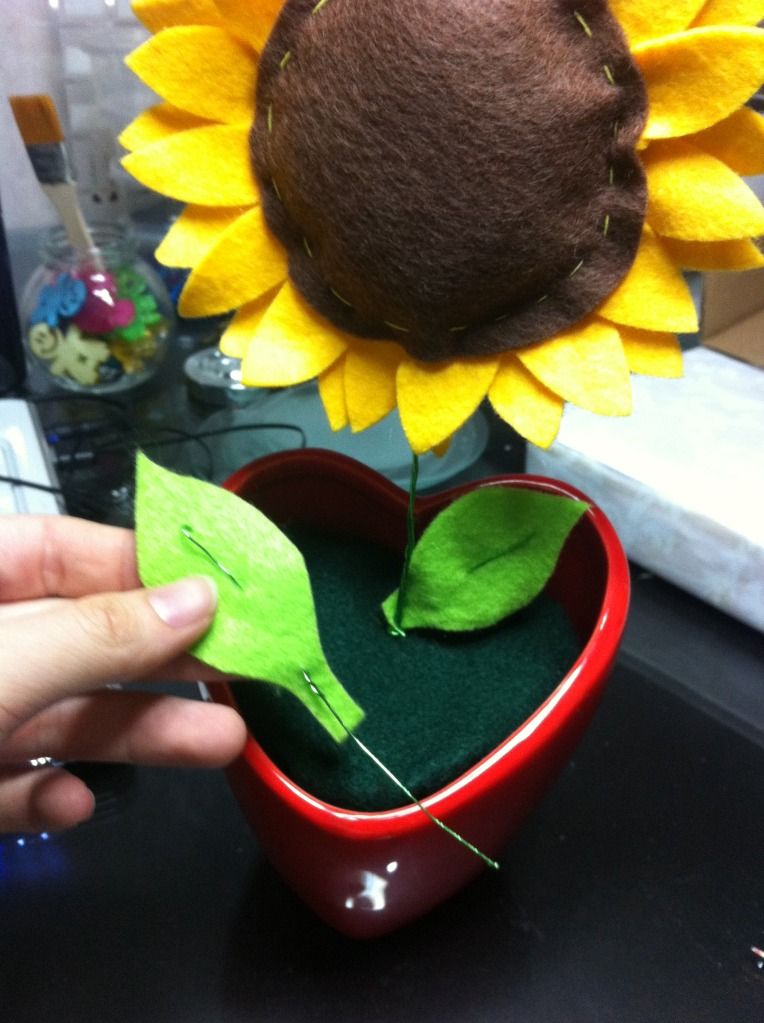
 It was a little plain, so I thought some bright leaves would be good. Besides, the flower would need green leaves to photosynthesize doesn't it?
 I used a needle to poke 3 holes in the leave so the wire could fit in easily.
 Put the wire in this manner 'In --> Out --> In'. Fold it at the back and come out from the first hole (bottom) to meet the first front piece of the wire and twist them together. When tat is done, just twist them to your sunflower plant.
Tadaaa! All is done! My customer from BoxOfHobbies wanted to add a little message too. I used white acrylic paint for this.

Did you like the sunflower tutorial? I hope you enjoyed reading it as much as I enjoy sharing it! Thanks for dropping by! This is by far my most time consuming project ever! It was great fun though. Well, that's all for now! Toodles!

Friday, 5 October 2012

New Pet Balloons!

 Morning everyone! How's everyone doing? This picture above was taken after eating 'Indomee Super Hot' from Lunch Box. And yes, it was really super hot! My first mouthful and I could feel the heat bursting out of my ears! Phew! It was nice though. Spicy food are awesome!

This week has been another busy week for me. Fun Factory is over (Which I just came to realize I have not posted anything about it yet. I shall update you guys soon about it.) and Talent Night 2012 has came and gone as well.
 We did the props for Talent Night. From the buildings with tiny windows to the backdrop and everything else. As always, props are made and they go up slowly.. but demolishing it was way easier and the 'Godzillas' really enjoyed smashing the buildings. Oh wells, at least everything has passed now.
 A rainbow painted canvas. Things were added on after that, but I somewhat still like it plain. (perhaps with a white silhouette butterfly).
 October is a pretty good month. It's only 5th and I already have 3 big orders for BoxOfHobbies. Time is gonna be spent wisely! The picture above shows a sneak peak of one of my projects. Still halfway done.
 Was thinking about Roxy in college and started drawing this. Alright, so maybe I over-puffed her. But I couldn't resist it. So adorable!
The original Roxy.

*Commercial voice* Have you ever wanted a pet but couldn't have one? Maybe your family didn't want one? Or you're allergic to fur? Or perhaps it's just a little too messy to keep one! No worries! We have a new kind of pet in town! I call it, the Follow-Me Pet!
 Toddlers LOVE them and they're definitely great for parties or even just to surprise someone. Bring one for a walk and see how your neighbors react!
 These are the designs I currently have. We have lots of different pets in store! From the household doggy, to the t-rex of long long ago. The tortoise is already sold out though. You can purchase them from BoxOfHobbies ! All they need to eat is a little Helium. They can survive for approximately 2 weeks before they need a 'revival'. Yes, they are REUSABLE. How awesome is that?!
Anyways, I'm going to end this post with a giant smile from 'I haven't got a nice name for my awkward rhino yet. Hmm.. any suggestions?' and me! Tadaaa! Bye!