|
| Missing my blue green hair. |
Hi Everyone! Today is all about Olaf! I've recently posted my tutorial on my "Jack Sparrow Clay Figurine" and couldn't miss out dear little Olaf!
"Oh, I don't know why, but I've always loved the idea of summer, and sun, and all things hot..." - OlafI took an estimated 3hours plus to make Olaf, and spent most of the time fixing his head. (The rest of Olaf's body is pretty easy to make) It's not easy to get the exact 'Olaf head shape' I want and I actually remade the head trice before I thought it's time to move on.
"Oh, I don't know why, but I've always loved the idea of summer, and sun, and all things hot..." - OlafI took an estimated 3hours plus to make Olaf, and spent most of the time fixing his head. (The rest of Olaf's body is pretty easy to make) It's not easy to get the exact 'Olaf head shape' I want and I actually remade the head trice before I thought it's time to move on.

Here's my little Olaf! I didn't realize till people commented, that my nails were pretty matching.
I did that with acrylic paint for Christmas and just didn't bother to remove it.
Here's what you need :
1) Clay (White, Black, Brown, Orange)
2) Thin Wires
3) Wire Cutter
4) Tools (optional)
5) A good dose of patience
6) White glue/bake and bond


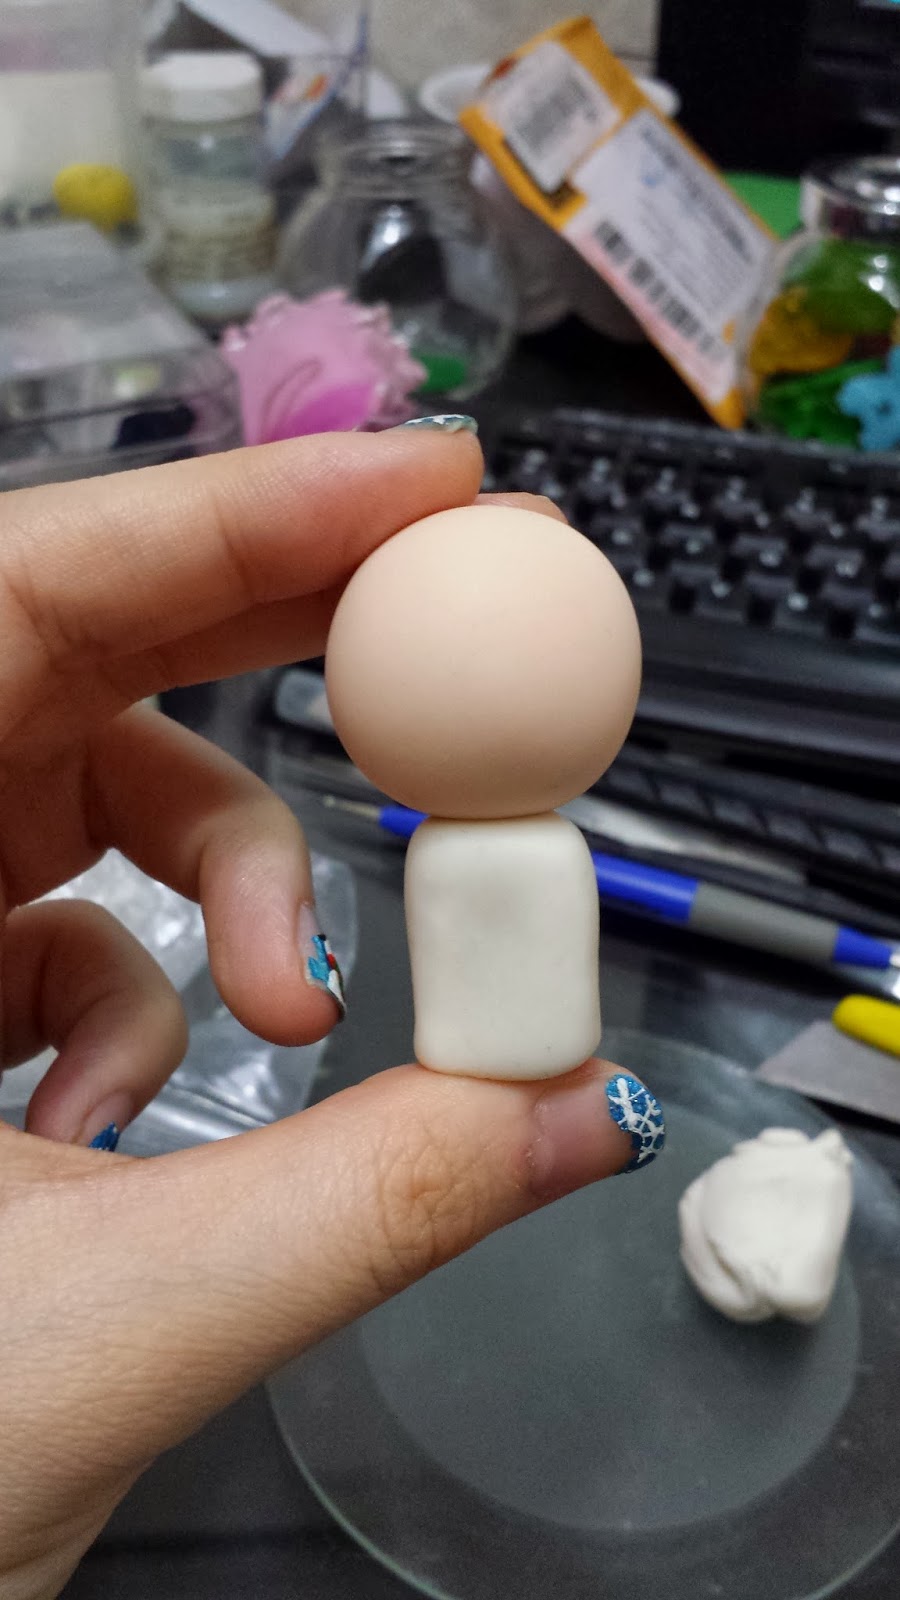
So, I started out with Olaf's body first. They were really easy - just two blobs of clay, one bigger than the other. For the top blob, roll it into a ball and gently tap it to make it flat on 2 ends. As for the bottom blob, gently press the SIDES of top part till it's 'slimmer' and has that slight triangular shape. Place thin wires to estimate where his hands will be. You can place it anyhow you want.
The head can be a little tricky. You got to make it like a diamond shape, but rounded at the ends. The bottom part (Olaf's mouth onwards) should be longer than Olaf's nose to forehead. When you got that, I used my ball tip tool to 'draw' Olaf's smile. You can use a blunt end of a toothpick to do so if you do not have the right tools. Press the bottom part of the mouth a little so that the upper lip juts out. It's not that easy, I remade the head trice because of Olaf's smile. Don't be discouraged!


Shape a tiny piece of clay into a rectangle. This would be Olaf's adorable tooth. Tuck it under his upper lip which you made by drawing his smile. Use white glue or bake and bond if you need to.
The nose is a tiny triangle with lines slit across, and the eyes are fairly simple. 2 black dots of clay smaller than 2 already small white dots of clay.
Roll 2 balls of clay for his feet. Again, like the bottom part of his belly, make it slightly triangular. You can use a wire to attach them properly if needed.
Roll 2 balls of clay for his feet. Again, like the bottom part of his belly, make it slightly triangular. You can use a wire to attach them properly if needed.
Poke 3 wires on Olaf's head to estimate where it'll be. Then continue with his hands.

Condition your clay well. If it's still hardy, this part may not work out.
Place the clay in between your thumb and your index finger, then, push a wire through it while rolling your thumb and index finger. The clay should be covering the thin wire. Remove excess clay by repeating the same thing holding it slightly tighter. For the ends where his finger sticks out, leave the clay SLIGHTLY (really just slightly) more and use a scissors to cut. Tap the sides with your hands or any tool so the cut doesn't seem so obvious.
Olaf's hair is exactly the same thing, but if you'd like to bend it like how I did, bend it first OR bend it after you applied the clay and it hardens slightly. If the clay is too soft when you bend, the whole thing will just come off. Use scissors again to help cut the tiny bits sticking out (sewing scissors are very tiny and could help better than normal scissors if available).
Finally, add on his buttons! The 3 tiny balls of clay buttons doesn't have to be perfect. In fact, Olaf looks cuter with imperfect buttons!

Olaf's on HIGH demand.
Well, who can help it? He's just too adorable!
Instagram : CraftySupermom
Insta Hashtag : #BoxOfHobbies ; #SupermomCollectibles
Well, who can help it? He's just too adorable!
Instagram : CraftySupermom
Insta Hashtag : #BoxOfHobbies ; #SupermomCollectibles