Wednesday, 30 October 2013

My Attempt On Salmon Porridge

Once upon a time, I ate a superbly delicious porridge. It was soooo good that I just had to try making it! And thus the salmon porridge experiment.

I was pretty excited when I came across this whole chunk of salmon at only Rm12 in Empire's Jaya Grocer. It's much cheaper as they are mostly parts that are unwanted (bones, tail and everything). I thought it was a great idea to use it and try out the salmon porridge. So I bought it.
 Of course, what's salmon porridge without a nice chunk of salmon meat? I bought this to be added in later so that they'll be pieces to munch on.
 Together with my maid (my sensei), we washed the fish and boiled it to make the porridge 'soup'.
 When that was done, it was my job to separate all the meat and the bones.
There was soooo much meat! And of course, crazy a lot of bones too! Bones that you'll need super vision to catch.
  The meat was added back in the porridge together with some seseme oil, salt and pepper. The bigger chunk of meat from the second salmon was placed on another plate with soy sauce, salt and pepper (taste super awesome!).
 Looks good doesn't it?

Unfortunately.. as they say, looks can be deceiving.
The salmon porridge didn't turn out how I expected it to be. Thank goodness I had that extra piece of salmon meat! What's my mistake? I really don't know, but I think I should've added soy sauce in the porridge too. I guess I'll have to make a second round to figure it out ;) heh!

#supermomzlife

Follow me on my journey
Instagram : CraftySupermom
Do follow me on my blog too which you can do so on the bottom right of this page!

Thanks for dropping by! See ya!


Friday, 11 October 2013

Happy Smiley Cup!

Mug painting once again!
Customer's order

My customer sent me a photo of the picture she wants and added some words for the back of the mug. I started out by drawing the outline.
I took a few tries to make sure the drawing looks nice.
Words are added behind and the whole thing was left to dry.
Once that was done, I painted in the cartoon and the heart behind the mug, left it to dry and baked it in the oven for about 45minutes. The mug was left in the oven till it cools down.

That's all !
Thanks for dropping by!

Tuesday, 8 October 2013

Little Clay Ballerina

In August, I got an order for a little clay ballerina keychain.
It was my first time making a bellerina. I'm pretty satisfied, especially with her adorable tutu!
 I needed to balance her on something else her skirt would be flat on one side if she leans against the table.
 I really like the skirt and shoes!
Here's a zoomed version :
 Adding on her hair.
 I actually forgot to get the full shot of the keychain, so I got the customer to snap one for me.
 A little too bright, but at least you can see it (:

That's all! Thanks for dropping by!

Monday, 7 October 2013

All About Avians

 Look everyone! It's my new little friend!
(Who has no name because G-Shen was too lazy to come up with one)
 *screams in wonders* It's standing on my hand and not flying away!!
See! (: How cool is that? I want one too!

Today's post is on my drawing of a peacock some time back. I haven't really touched colour pencils in a very very long time. So, I decided to go back to basics and experiment with them. You can say this is my first colour pencil artwork excluding all those childhood scribbles and doodles.

I started out with a plain pencil drawing of a peacock.
I've always been fond of drawing birds especially pheonix but decided that I wanted to try something similar yet different.
 I always had a fear of using colour pencils in my nicely drawn pencil art where i was already satisfied with the results in black and white. I was always afraid that the colour pencils might ruin the whole thing. But, never try never know huh? I prepared my heart for the worst outcome I can imagine.
 I didn't know where to start. I just coloured in everything in light blue.
Slowly, I started darkening certain lines and shade in necessary areas.
 So far so good. I really liked how the colours turned out. Especially the face and the body.

 I followed the lines drawn on the top of the head and added in the eyes.
I was praying so hard that the eyes would turn out alright.

 The I coloured in the rest of the tail feathers.
 Tadaa!!! I was really happy with the results I couldn't stop staring at it and admiring it for at least an hour!
I guess the peacock being dressed in my favourite colour contributed a lot to my love for it.
Summary of the whole colouring process.


And to end the post, here's a few of my previous artworks on avians.

 Pheonix
 Different types of eagles.
Sorry for the bad photo quality.
 Last but not least, my ultimate favourite..

..
..
..
..
..
..
..
the...


PHENOIX!


Painted with Buncho paint.

That's all for today! Thanks for dropping by!
Bye!

Monday, 23 September 2013

Clay Monkey Clock

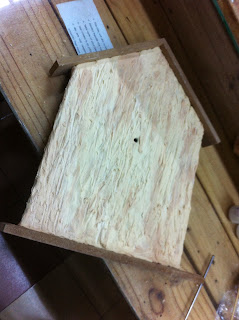
Transforming a plain clock board.
I recently started using some air dry clay, especially for coating larger surfaces since oven baked clay can be really really really expensive. Besides, larger items can't fit into my little oven anyways.

I started exploring and learning more on these artsy fartsy skills and have journeyed into making a monkey cartoon clock. I'm quite happy with the results. In which you'll see later on.
 I coated the middle part of the clock board with 2 coloured clay. Beige and beige with a hint of brown mixed into it. Then, I sorta scrapped it for the wooden effect. Blending them with my fingers occasionally.
 Then I started making twines and placing them on top of the board. I didn't stick it there just yet though, I left it aside to dry while I continue on other parts of the clock.
 The next thing I did was to coat the bottom base with green clay. Making it look like grass grew all over.
There was a tiny patch of brown on the bottom left for a more natural look.
 After that, I attached the twines and made some hearts to go along.
 When that was done, the monkeys came swinging by. I actually made them much earlier on as they needed to be left to dry before sticking em down the the clock base.
 More details like their eyes were added, then fresh green leaves on the twines and everywhere else.
 I quite like how they turned out. The pattern and shape of the leaves, and the way the little vines curl up nicely.

 My cheeky little monkeys. The one of the left is the biggest. It's eyes seems to be a little too scary though. Like they're popping out and may fall off anytime. I like the monkey holding the leaf as an 'umbrella' What about you?
We also have another little guy right down here :
 
 He's the tiniest of all 3 monkeys and even has got a banana for himself!

My lovely monkey clock. I really like how it turned out to be. Happy!
 
 It was a lot of effort and many hours were spent making this. About a 3 days combination of 22hours in total. Satisfied with the results.