Friday, 25 January 2013

Fancy Birds

Hi everyone! Remember this? I made this back in 2011.
I sent it to a shop and recently got it back. I have now decided to keep this piece for it was my FIRST creation inspired by a pheonix.

This time around, I didn't have that much time, so I decided to make something simpler compared to my first. I still hoped it turns out as beautiful though. Here goes :
 I started out with a brown base and coated it with marbled pink red clay all over. The head, the wings, the body and eventually the tail as well. I wanted more colours in the wings and the tail feathers, so I completed the bird as so :
 After baking, I realized that it looked out of proportion. The body was too small and the tail feathers weren't long enough. So I added more stuff to my bird. Extra tail feathers!
To my surprise, adding just two tail feathers make such a huge difference (or at least, I felt that it does).

After completing my first bird above, I tried to make a yellow bird.
 The face features did not turn out like how I wanted it to be. It was really pretty at first, but looked a little off after adding the orange beak.

I usually make the base of the body and the wings together, but decided to separate them this time.
After I was done mixing all the coloured clay and lining them up, this was how it turned out to look like. I really like how the wings turn out. Pretty. The face could be better, but I'm satisfied.

Well, that's all for today's post! I hope you enjoyed reading!

Wednesday, 16 January 2013

Handmade Denim Wrist Cuff

 Yo everyone! Wassuuup?!
I recently decided to rummage through all my clothing to see what fits and what doesn't. Those that I never wear anymore were separated to a corner. And from there, I found a lot of new fabric to experiment with!
 And so, I made this! My old jeans are all collected on my spare mattress to be experimented with. Yay!
My very first handmade denim wrist cuff! They are so far, more successful compared to the denim wallets and bags I tried to make. Oh well, I'll get them done and show you guys soon.
 I made two different denim wrist cuffs if you can tell. One had a bigger button (first) and the other a smaller one (second)
 I wanted to use my sewing machine to sew the sides and to connect the ends together, but the denim layers were too thick. So, I sew them by hand and got help from the pliers.
 Added random denim piece to the other side and then the one with the button hole.

My second piece made :
I'm hoping to be able to grab hold of a larger grey/silver button to fix up instead of this one.
Well, that's all for this post. I'll be making more for BoxOfHobbies if I can hunt down more jeans.

Thursday, 10 January 2013

My Happy Beginning !

 
Hi everybody! I'm a happy child. Oh, yes I am.
I have great news to share! Well, many of you know that I've launched a new online shop called

The whole thing was officially launched on 1st Jan 2013. It was a huge step for me. I was really excited and nervous at the same time. I don't know what to expect or how things will go in the future. 

I joined a bazaar on 4th Jan 2013, which I lost some money there. But God is great! Though I lost money, there was a lady who saw me drawing then and was interested in them. I have never done drawings to be ordered before, but I told her I could try. This opens up a new journey for me. I may not know how it will work out, but I'm thankful for that.

Other than that, more great news came by. Entering just 2 weeks into the year 2013, I have been featured in 2 fashion sites!


 Sha-Lene from Your Shopping Kaki did a review for me which you can see here. I truly appreciate it. Thanks Sha-Lene, for my VERY FIRST review on Walk In The Closet | BoxOfHobbies .
 The 2nd place my item was featured in was Fashion Online Malaysia which you can see here.
I was pretty surprised because I knew nothing about it till I randomly received an email with the subject "YOU'VE BEEN FEATURED!"

Seeing the email title itself makes my jaw drop. Literally.
I am overjoyed! Praise the Lord for such an amazing beginning of 2013 !

Thanks everybody, for dropping by! Be joyful always!

Wednesday, 9 January 2013

Tutorial : Chocolate Pizza Dessert

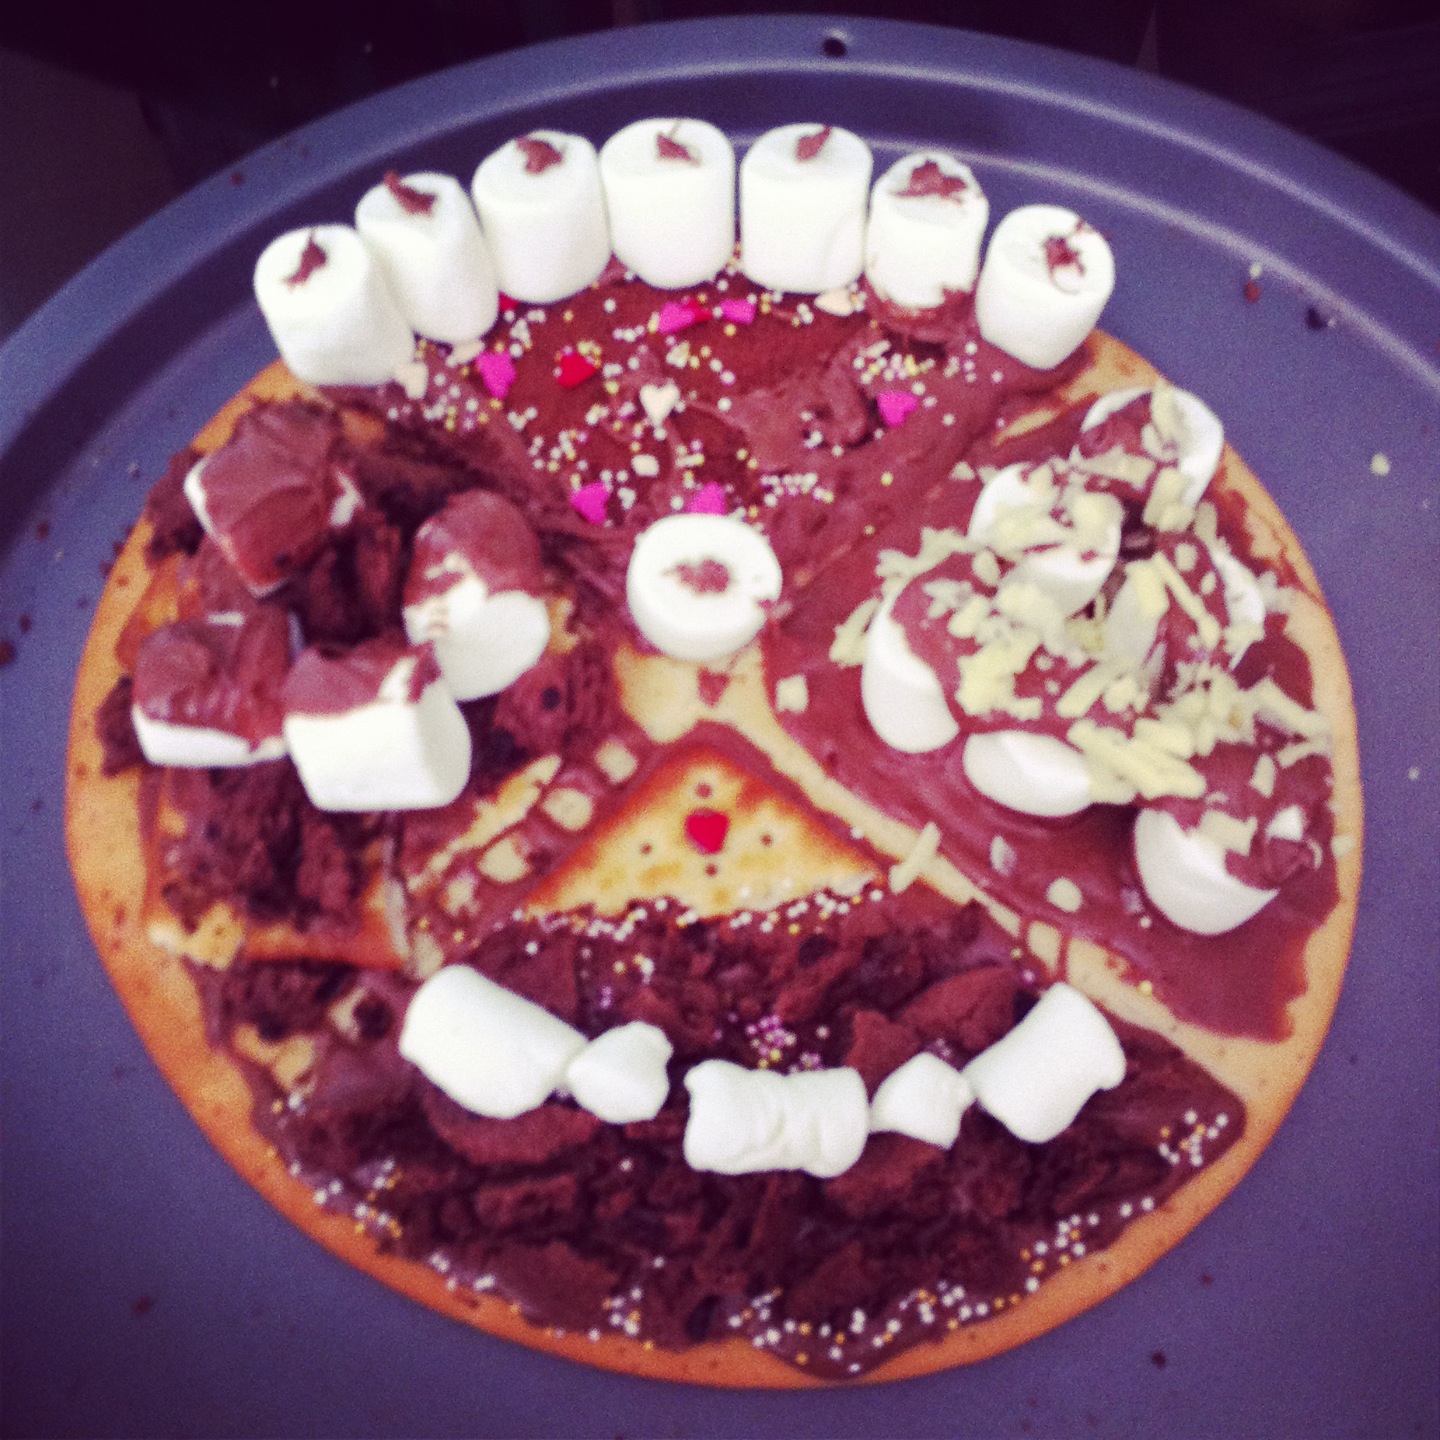
 It looks like a chocolate candy pizza man doesn't it?
Everybody, meet my new friend. His name is... umm.. uhh.. okay, so.. he doesn't have a name.
Let's just call him Mr.Choco

Name : Mr.Choco
D.O.B : 7th Jan 2013
Creators : Ethan Soh, Yap Yong Loon, Justin Wong & Jolene Lew

 So, the bunch of us came together and made pizza for supper (It was suppose to be dinner, but everyone came late and we end up making pizza till 3am in the morning.) We had three different pizzas by the three boys since they haven't made pizza before and so, I suggested that they have a competition making em. Video shall be out soon.

We did plan for a dessert pizza, but couldn't gobble up anymore, so we decided to rest and make it the next morning. This meant that the chocolate dessert-y pizza is our BREAKFAST.
 I divided the pizza base into 4 parts so all of us could 'decorate' our own.
 This is mine. It has melted chocolate, chips more, sprinkles, marshmallows, a piece of cracker and a single heart sprinkle.
 I didn't use the whole single piece of chips more cookie, so I dipped the rest in melted choc and ate it just like that! Super duper chocolatey !
 Our four piece after baking and cut.
 This is mine, the prettiest one (self proclaimed).
 Justin Wong's
What he did was he sat on the chair, said "Can we faster do, finish and eat?" then he slobbered on some melted chocolate, threw marshmallows on, slobbered more chocolate, sprinkle cheese randomly and went "DONE!"
 This one's pretty too, I'd say. It's done by the guinea pig aka Ethan Soh.
I'm surprised, he has good decorating skills
His piece is first coated with a layer of peanut butter, then another layer of melted chocolate to his pizza. Lastly, he added the marshmallows and sprinkles to finish up.
And this is Yap Yong Loon's. His chocolate pizza looks somewhat similar to Justin's doesn't it?
Well, he did this with more care than Justin did, but it seems a little messy doesn't it? Perhaps he likes the messy look? haha! His had crackers inside! And that makes it less sweet, which is good for non-sweet toothers. All the other 'pizza's were uber sweet!

Want to make your own? 

1. Have your pizza base 50% or 70% baked.
Why : If you don't do so, and bake your whole pizza base together with the chocolate, your chocolate will harden instead of staying melted.

2. Melted chocolate is a must!
 Why : It makes everything taste more chocolatey! And, acts as superglue.
How : Double boil it. Have a bowl containing chocolate placed inside another bowl. Boil some water and pour it into the first bowl (NOT containing the chocolate), and wait for it to melt. You can use a plate to cover the top so the hot air would be trapped and the chocolate would melt faster.

3.Gooey marshmallows adds a soft side to the pizza!
How : Place them anywhere on the pizza. When all decoration is done, place the whole pizza to bake for a while. Marshmallows will turn fat and their insides would be gooey! Just nice to munch on and enjoy!

4. Fruits!
Why : They're healthy AND yummy! Most of them are sweet too!
Ethan wanted to add bananas in his, but forgot about it halfway. I think there's a lot of fruits that would go well with this. Just do trial and errors. You can split the pizza into 4 like what we've done and add 4 different flavours!

5. Other things you can add to your dessert pizza
- Milo powder (They'll come out crunchy)
- Sprinkles
- Chocolate cookies
- Chocolate pieces
- Corn flakes (Adds a crunchy side without adding too much sweetness)
- Crackers (balance out the sweetness of the pizza)
- M&Ms ! These would go great AND look great!
- Pretzel sticks
- Sugar (Sprinkle a tiny bit for some snowly/frosted effect?)
- ANYTHING THAT YOU CAN THINK OF ! (:

That's all for today's post! I hope you enjoyed it !


Saturday, 5 January 2013

Panda Pillow Plush

Hi everyone!
Here's a little something that came in a package for me.

Panda Pillow Plush! These plush are worth about Rm80-Rm100+ at Pyramid. And they don't have any pandas in stock neither. I have 4 more, and they're available to be adopted at Rm75 each. Just email boxofhobbies@gmail.com to order!

Just a short update on a product made. My customer requested for a mini sized bracelet for her niece. She requested for a puppy to be on it, and here's what was made.
 I think it's simple and adorable. What about you?


Tuesday, 1 January 2013

Clam Shell Pen Holder

Hi everyone. As I've always told many of you, I collect rubbish. And when I say that I collect rubbish, I really do collect rubbish. I mean, who keeps clam shells if they aren't putting them into an aquarium? Right?

Well, here are 6 clam shells that have probably been in my "Rubbish-Made Treasure Box" for almost a year. I 'saved' them from a restaurant after my mom ate their flesh. Poor clams.
 All of them are of a different size. A customer requested for a very simple pen holder and I agreed to that request. However, I soon realize that more weight is needed at the base in order to hold the pen upright. If the base is too light, the display item would topple over when the pen is placed in position. I rummaged through my junk and found these unused clam shells. How useful.

Not only are they heavy enough, but they have a smooth curve that could resemble a hill. My customer requested for a pen holder that has a tiny house and the word thank you. I thought about the clam shells and believed that the product would look so much better on a hill rather than flat land.
 And so, I coated the clam shell with green clay. The bottom part where the clay folds over was a bit rough and took a longer time to smoothen. Good thing it's the bottom, for it won't really be seen when displayed.
 Fixing the wire up was pretty challenging. The wire was not strong enough to hold a heavy pen. Also, it did not have the proper ground to hold it in place. It could not pierce through the clam shell.
 I decided to add clay on the left to ground the wire, and made the wire thicker and stronger by twining two wires together. I tested it out with a pen, and it worked! The little house was then made. I baked everything, painted the THANK YOU word, and coat it with varnish.
The final product actually had grey stones as a road. It leads from the door to the left side, curves by the smiley face and reach beside the Y till the very bottom. It actually looks really adorable, but I forgot to take a picture.

Oh well. This is all for today's post! I hope you enjoyed reading! Thank you!

Fancy Mustaches

 So once upon a time, I had a mustache farm.
I bought these mustache necklace in a bulk of 12 so that they'll be slightly cheaper.

 and with these mustaches, I decided that I should paint on them with acrylic paint.
 
Above are 4 designs that I have done and paused at. 8 more mustaches to be done and shared with the world! All these are hand painted and are known as one of a kind.

My favourite one is the blue and white mustache. I find it really adorable. I will post up more pictures after I'm finished with the 8 others.